
Homemade Waffle Cone Recipe: Delicious and Crispy.
There’s something magical about biting into a warm waffle cone. It’s crunchy, golden, and sweet, making summer even sweeter. I was nervous making homemade waffle cone recipe for the first time, fearing they’d be bad like store-bought ones.
But after a few attempts, I found joy in making them. The batter sizzling in the iron, waiting 3.5 minutes for it to turn golden, and seeing my kids’ excitement when they saw the cones were all worth it.
homemade waffle cone recipe is more than just ice cream holders. It’s about creating special moments. They’re sturdy, delicious, and customizable, making them perfect for any gathering.
FAQ
What is the best homemade waffle cone recipe?
The top waffle cone recipe uses simple ingredients like flour, sugars, eggs, and butter. Making your own waffle cones is best when you use fresh ingredients. You can also customize the flavors to your taste!
Can I make waffle cones without a waffle cone maker?
Yes, you can! You don’t need a waffle cone maker to make great cones. You can shape them manually with a cone mold or even parchment paper.
How do I keep my homemade waffle cones crunchy?
To keep your cones crunchy, let them cool completely before storing. Store them in an airtight container. Add parchment paper between layers and include a silica gel packet for longer storage.
What are some creative flavor variations for waffle cones?
You can add different flavors to your waffle cones! Try adding cocoa powder for chocolate cones. Use cinnamon or vanilla for classic tastes. Or, try matcha or coffee for something unique!
What should I do if my waffle cones break while shaping?
If your cones break, don’t worry! You can use melted chocolate to fix them. Or, use the broken pieces as tasty toppings for your ice cream.
Are waffle cone recipe worth the effort?
Absolutely! Homemade waffle cones are fresh, customizable, and have a great aroma. They’re better than store-bought ones. Plus, making them can be a fun activity with friends and family.
How long can I store homemade waffle cones?
You can store homemade waffle cones for up to two weeks. Just keep them in an airtight container. Use parchment paper in between to keep them crispy.
Can I make savory waffle cones?
Yes! You can make savory cones by using less sugar and adding spices or herbs. They’re perfect for fillings like chicken salad, hummus, or even tacos!
waffle cone recipe
Let’s dive into their story and why making them at home is worth it.
A Brief History of Waffle Cones
Imagine the 1904 World’s Fair in St. Louis. An ice cream vendor was in trouble because he ran out of dishes. He quickly made a waffle to hold his ice cream, creating the first delicious waffle cones. This accidental creation became a favorite, evolving into the cones we love today.
Why Homemade is Better
Store-bought cones can’t match the golden crunch and love you put into homemade ones. Plus, making them yourself means you can avoid additives. You can choose gluten-free or sugar-free options for everyone’s needs.
Essential Ingredients for Waffle Cones
Let’s explore what makes this recipe stand out.
Common Ingredients You’ll Need
Here’s the heart of every waffle cone recipe:
- 1 cup all-purpose flour – the backbone for structure and lightness.
- ¼ tsp cinnamon and ¼ tsp salt – balance sweetness and depth.
- 2 eggs – bind everything together naturally.
- A mix of ¼ cup granulated sugar and ¼ cup brown sugar – caramelizes to perfection.
- ¼ cup melted butter – adds richness without greasiness.
- ¼ cup warm milk – ensures smooth batter consistency.
- 1 tbsp vanilla extract – enhances that classic sweet aroma.
Optional Flavor Enhancements
Feel free to add your touch! Try:
- A pinch of nutmeg or espresso powder for depth.
- Finely shredded coconut or crushed nuts for texture.
- Cocoa powder for a chocolate twist.
- Orange zest for a citrus kick.
Tools and Equipment Needed

Making homemade waffle cones requires the right tools. You don’t need fancy gadgets unless you want them.
Essential Kitchen Tools
First, use what you already have in your kitchen:
- Mixing bowls and a whisk or fork
- Measuring cups and spoons
- A spatula for flipping batter
- Parchment paper for shaping cones manually
Recommended Appliances
A waffle cone maker makes things easier, but it’s not essential. My top pick is the Cuisinart Waffle Cone Maker. It fits well in a cabinet and makes cones perfectly. If you’re looking to save money, a standard waffle iron or a skillet with a cone mold works too.
When picking, consider these points:
- Waffle Cone Maker: It ensures consistent results. Look for non-stick surfaces to prevent cones from breaking.
- Alternative Options: A waffle iron (like the T-fal C48B532) or a cone mold set for manual shaping are good alternatives.
- Storage Tips: Store your maker flat in a box—mine stays tucked above my pantry shelf.
Step-by-Step Waffle Cone Preparation
Let’s dive into the heart of the easy waffle cone recipe. We’re turning flour into golden perfection.
Mixing the Batter
Begin by whisking dry ingredients in one bowl. You’ll need flour, cinnamon, and a pinch of salt. This makes a fluffy base.
In another bowl, mix eggs, sugars, butter, and vanilla. Slowly add milk while whisking until it’s smooth. Remember, griddle care is key—clean it before cooking for even results.
The Right Technique for Cooking
Heat your waffle iron until it’s hot. Place about 3 tablespoons of batter in the center and close the lid. Wait 2 minutes without peeking.
When they’re golden, they’re done. Let them cool on a rack to crisp up. If edges stick, lower the heat next time. Don’t worry if your first cone is a bit lopsided. You’ll get better with practice!
- Use a light hand with the batter to avoid soggy centers
- Rotate the cone slowly while cooking for even browning
- Let cool completely before filling to avoid steam softening the crispness
Tips for Perfectly Shaped Waffle Cones
How to Use a Waffle Cone Maker
Cook batter at medium-high for exactly 3 minutes. The waffle should look golden but still pliable.
Wait until steam stops rising to remove it. If you wait too long, they’ll become hard like cardboard. If you remove them too soon, they’ll sag.
Manually Shaping with a Cone Mold
- Work fast—no more than 10 seconds after lifting the waffle. Spray your mold with cooking spray first to avoid sticking.
- Roll from the wide end, pressing firmly but gently. Hold the shape for 15 seconds until it firms up. Don’t panic if edges fray—the crunch will still taste divine!
- Pinch the base tightly to seal leaks. Adding a chocolate drizzle on the bottom (like my recipe’s optional chips) helps too.
If they bend or warp, tuck the edge under the mold and let cool completely. Imperfections add’t matter—handmade homemade waffle cones have charm, not flaws.
Flavor Variations for Waffle Cones
The best waffle cone recipe shines brightest when paired with creative flavor twists. Let’s start with the classic: chocolate-dipped cones. Melt dark or milk chocolate in a double boiler—never too hot or the texture will seize. Dip halfway for a casual touch or fully coat for a decadent dessert. While the chocolate sets, sprinkle with sea salt or crushed nuts for an extra crunch.
Take it further with these ideas I’ve tested in my own kitchen:
- Triple Chocolate S’mores: Layer melted chocolate, mini marshmallows, and crushed graham crackers while the chocolate is warm.
- Tropical Dream: Roll edges in shredded coconut and drizzle with pineapple-infused chocolate.
- Peanut Butter Swirl: Use a toothpick to swirl peanut butter into the melted chocolate coating.
- Salted Caramel: Drizzle homemade caramel over the cone and sprinkle flaky sea salt.
Don’t stop at coatings! Infuse the batter itself. I’ve successfully swapped ¼ cup flour with matcha powder for a green tea base or added vanilla bean specks for subtle sweetness. For a savory twist, try cinnamon-sugar cones paired with fruit sorbet—perfect for summer picnics.
Storing and Serving Waffle Cones
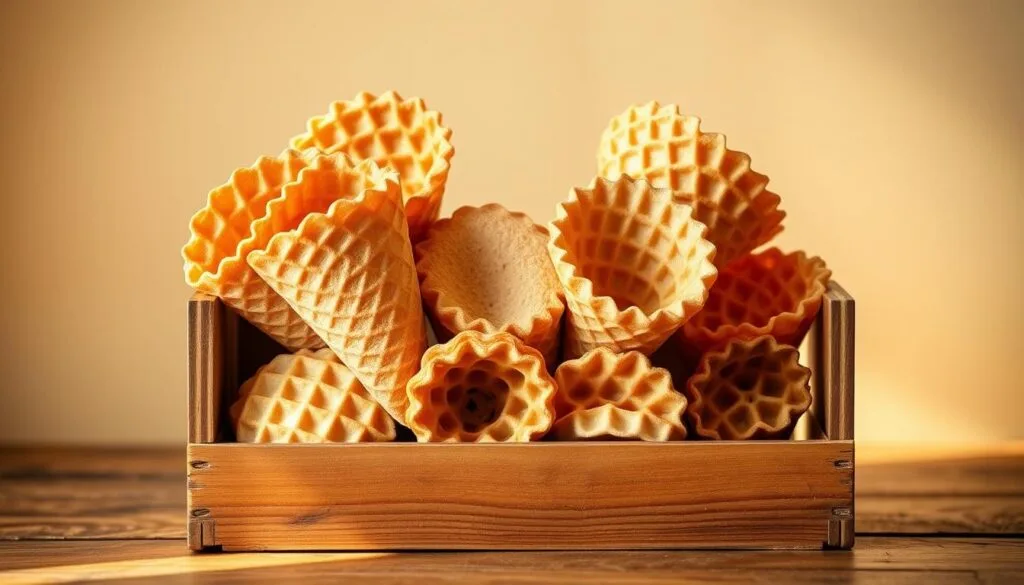
Here’s how to keep your homemade waffle cones fresh and serve them with love.
Best Practices for Storage
First, let them cool completely on a wire rack. Even after 1 hour, they can still get moist. For short-term storage, keep them in an airtight container at room temperature for up to 4 days. Need them to last longer? Stack cones with parchment paper between layers, add a silica gel packet, and seal in a freezer bag. This way, homemade waffle cones stay crisp for up to 2 weeks. Avoid plastic wrap—it traps steam. A breathable container or labeled ziplock bag works best.
Serving Suggestions for Best Enjoyment
- Warm them gently: Pop cones in a 250°F oven for 3 minutes before filling to revive their crunch.
- Create a DIY dessert bar: Arrange cones alongside scoops of vanilla, mint chip, or your favorite flavors. Kids love picking their toppings—think sprinkles or caramel drizzle.
- Pair with light summer treats: Fill with fresh berries or a dollop of whipped cream for a guilt-free dessert (each cone has 146 kcal!).
Creative Uses for Waffle Cones Beyond Ice Cream
Think of your waffle cone recipe as a blank canvas for endless creativity. These crispy treats aren’t just for ice cream. They’re perfect for surprises, both sweet and savory.
Craving something sweet? Try s’mores-inspired cones. Fill them with mini marshmallows and chocolate chips, then wrap in foil. Roast over a campfire until warm. Let cool slightly, then drizzle with caramel. For breakfast, layer Greek yogurt, fresh berries, and granola into a cone. Delicious waffle cones become grab-and-go nutritious bites.
- Mini mousse cups: Pipe chocolate or vanilla mousse into small cones, dust with cocoa.
- Fruit parfaits: Alternate yogurt, fruit, and honey in a cone for a handheld breakfast treat.
- Caramel apple twists: Core an apple, fill with cinnamon-spiced batter, bake, and drizzle with caramel.
Savory ideas are just as exciting! Swap sugar for herbs like rosemary or garlic powder in your batter. Fill cones with:
- Chicken salad with grapes and walnuts
- Hummus and roasted veggie bites
- Taco-inspired mixtures like seasoned beef or black beans
SwissBaker’s vanilla and red velvet mixes add flair to desserts, while lavender berry cones surprise guests. Their adjustable thickness settings let you tailor crunchiness.
Troubleshooting Common Waffle Cone Issues
Here’s how to turn mishaps into sweet solutions:
When Cracks Appear
- Use melted chocolate chips like edible glue—dab on small breaks to seal them. Extra chocolate adds flavor too!
- Wear heat-resistant gloves if batter sticks to your hands. They’ll help you shape cones safely without burning yourself.
- Reheat soft spots briefly in the waffle cone maker for 10-15 seconds to stiffen edges.
Humidity Hacks
High moisture in the air? Adjust batter consistency gently. Add a teaspoon of flour if batter’s too runny—this trick keeps cones sturdy. For extra crispiness, let batter rest 5-10 minutes before cooking. And when shaping, flip the easy waffle cone recipe batter onto a lightly floured surface to prevent sticking.
And remember, even broken cones can star in sundaes or ice cream sandwiches!
Conclusion: Enjoying Your Homemade Waffle Cones
There’s magic in enjoying a treat you made yourself. This waffle cone recipe turns simple ingredients into a special moment. It’s great for summer parties or cozy nights at home. Every batch is a celebration of your effort and creativity.
Recap of the Recipe
Start by mixing flour, sugar, and butter. Use tools like the CucinaPro or Brentwood Appliances cone makers for a crisp texture. Each step, from shaping to storing, leads to the joy of filling them with ice cream or toppings.
The best waffle cone recipe is about the fun in making it. It’s not just about following steps.
Encouragement to Experiment
Don’t just stick to vanilla! Try caramel, crushed nuts, or even savory fillings like fruit salads. Let your kitchen be your playground. If cones crack, adjust your CucinaPro’s temperature or use parchment.
![an image of [coffee cake muffins] dish presented in a table](https://www.passionofcooking.com/wp-content/uploads/2026/01/coffee-cake-muffins-dish-768x576.webp "Homemade Coffee Cake Muffins 2")